Hello! My name is Kelsey, and I’ve been part of the Put Me In The Story family since 2014. I’m so excited to share my experience planning my daughter’s first birthday party! As part of the Put Me in the Story family, I spent many years helping people create personalized books for special occasions, and in January, I got to make one of my own for my baby girl’s birthday!
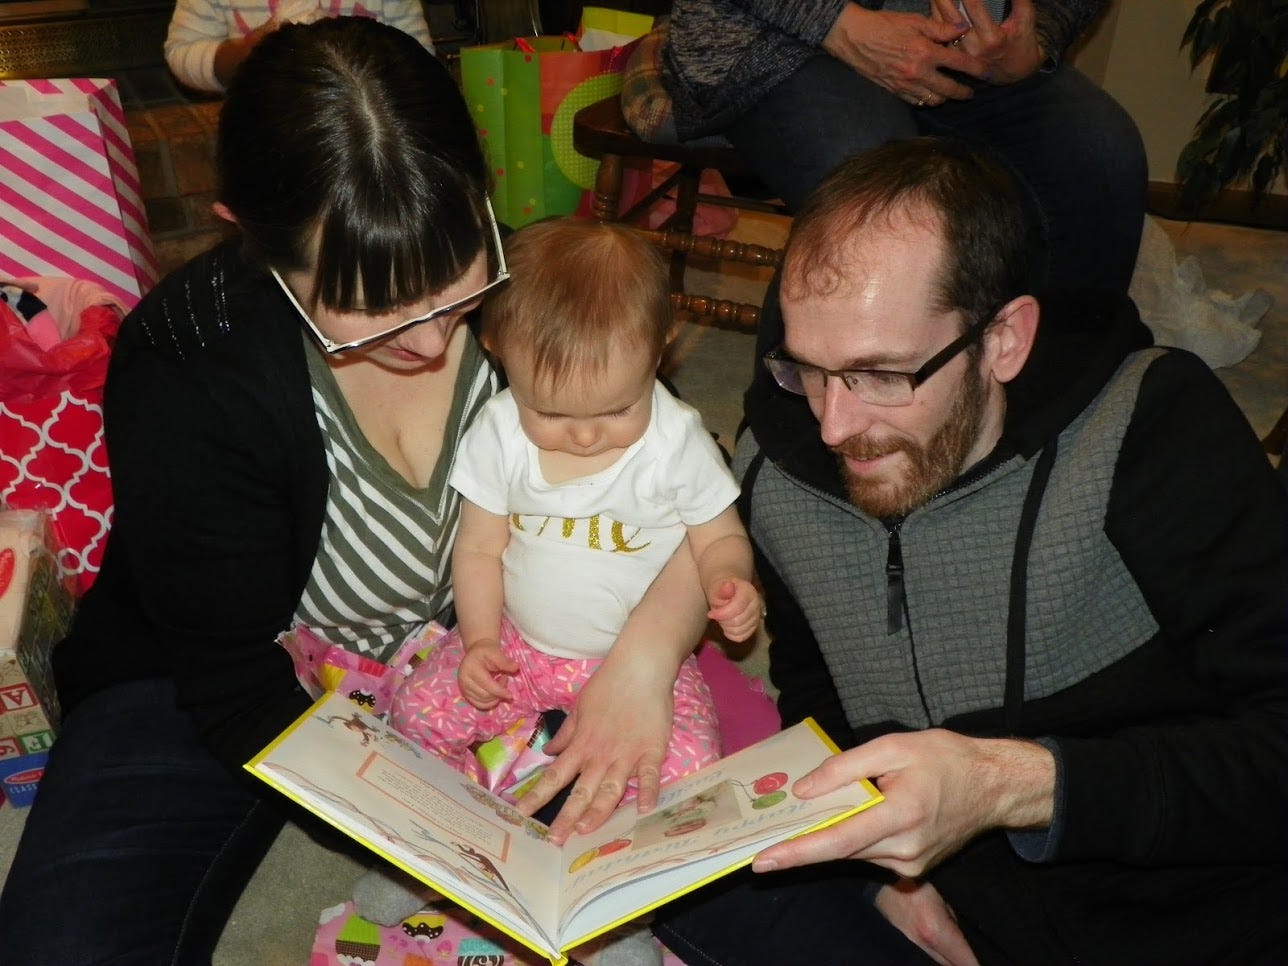
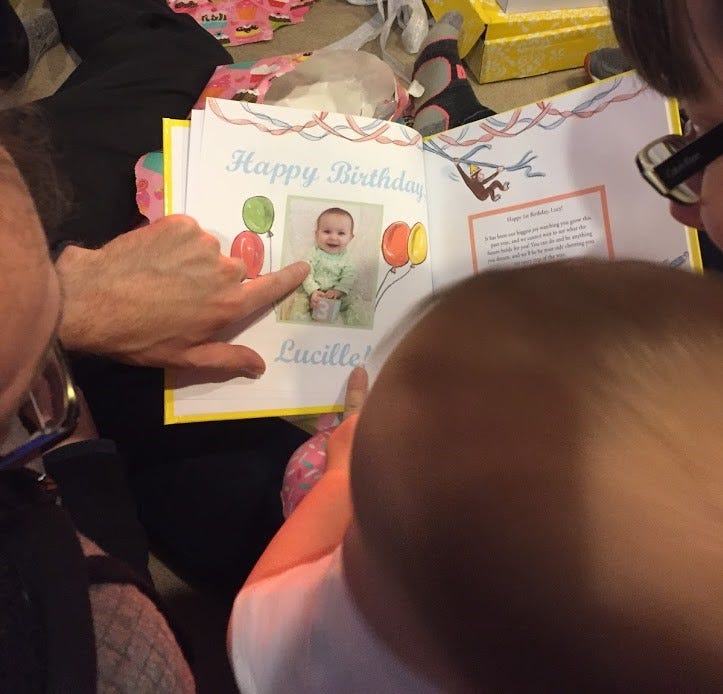
Lucy turned one in January, and I wanted her to have the perfect first birthday party to go along with the perfect gift. Sure, she wouldn’t remember it, but I would, plus it was our “last first,” so I put my doubt and worries aside and got to planning. Now I want to share the fun, joy, and stress of putting this event together with you. Even though it wasn’t always easy—I had a lot of questions, a few late nights, and got a lot of new craft supplies—in the end, I was left with happy memories that will last our family a lifetime!
With a January birthday, it’s easy for things to get moved to the back burner in the hustle and bustle of the holidays. Still, I knew I was going to have to start planning Lucy’s party sooner rather than later. My starting point had to be the theme of the party, which would guide every decision to follow.
Pick a Party Theme
After a quick internet search, I decided on a “Winter One-derland” theme. It fit the time of year and there was a plethora of resources to help with the planning. Then the holidays came and went, and I was no further along than the fanciful thoughts in my head. And now I was weeks away from having to pull this off.
When you’re out and about during the holidays, everything is magically winter themed. I had endless décor and products to choose from, so I wasn’t worried about making my Winter One-derland dreams come true. Then it was December 26th, and in the blink of an eye, the wintry items were ripped off of the shelves and replaced with fat cherubs and big red hearts. Oh no! I no longer had my theme.
With no progress made and three weeks to go, I had to move forward with a blank slate. What could I do that would make progress? Get the invites out.
Finalize the Guest List & Send Invitations
No point in having a party if there wasn’t anyone to party with! I looked into using an online printing company for the invitations, but since I needed to get them out ASAP, I opted for a local chain pharmacy that could print them the same day. I looked through hundreds of options and selected an adorable pink and gold design with three photo uploads. Perfect! Plus, it gave me my new party theme: pink and gold. It’s hard to go awry when all you have to do match colors.
When it came to who to invite to the party, I had questions. Mainly, do I invite my friends who don’t have kids? I’ve personally been to a few kid’s birthday parties before I had my daughter. But I’ve also been excluded from parties for the fact that I didn’t have a kid at the time. I wasn’t against inviting anyone, but would they even want to come to house with an untold number of sugar-fueled children? I decided that to keep the party to a manageable number— I’d invite just one or two of my closest childless friends and let them make the choice. Invites sent. Finally, one thing done and checked off!
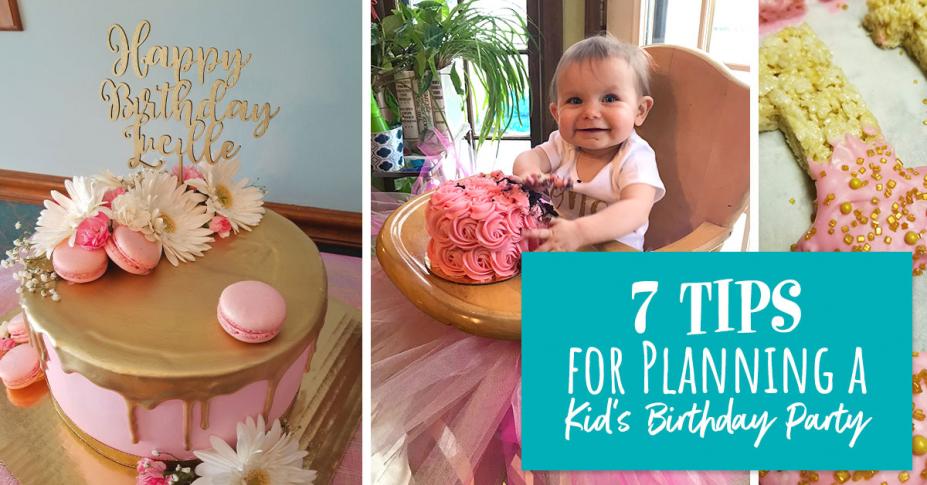
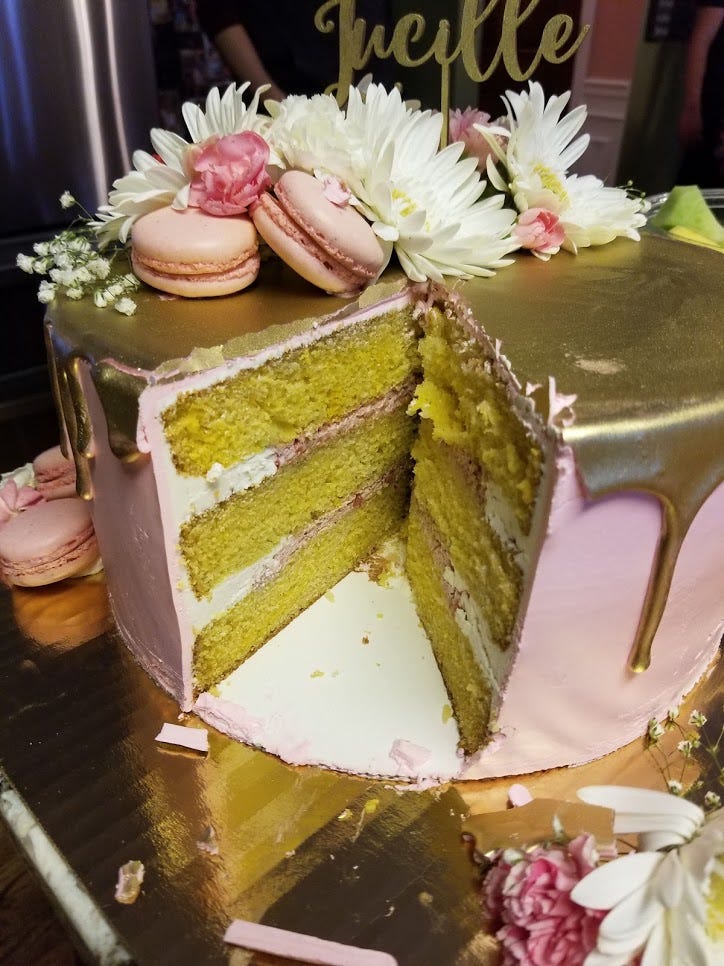
Design Your Dream Cake
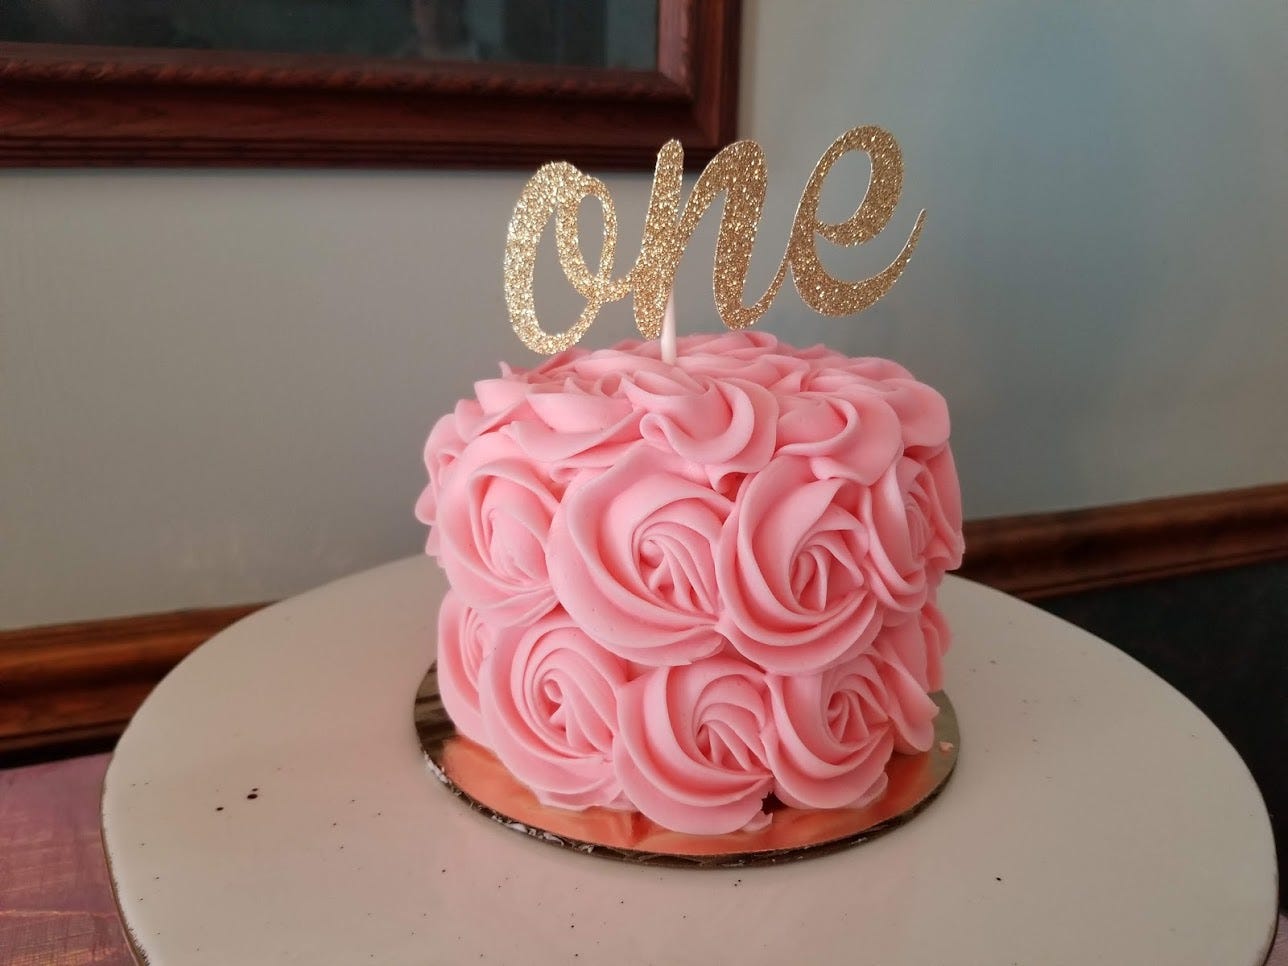
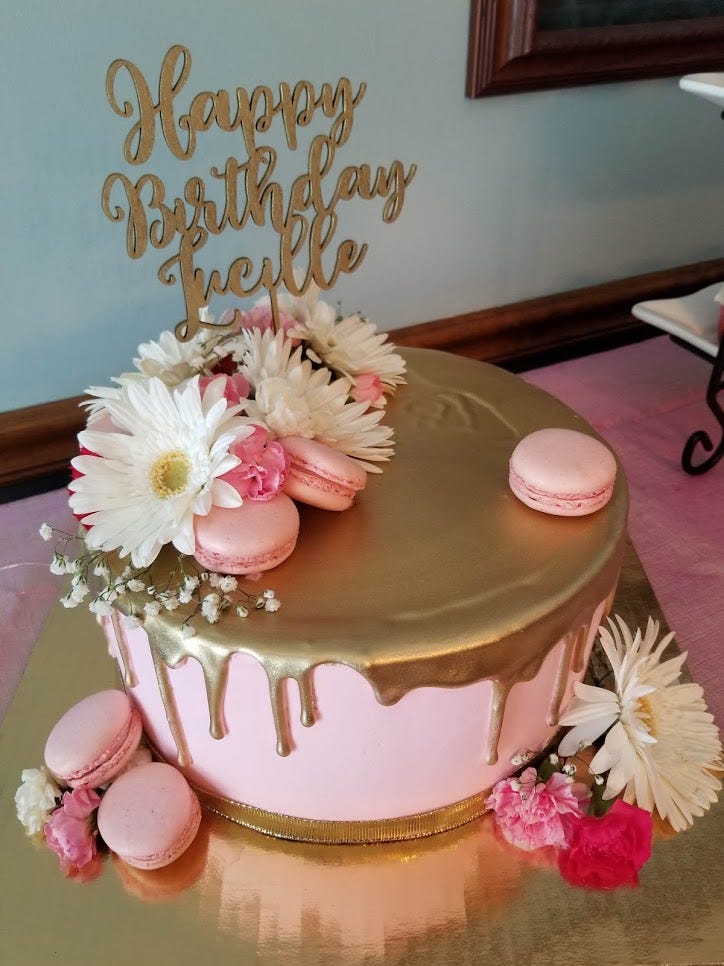
The next thing I knew I had to tackle was the birthday cake. I’m decent at whipping up baked goods, but for this special event, I wanted to go all out. I’d never ordered a fancy cake before, but I sure had Instagram’d a lot of them! With my new theme in mind, I started searching for design inspiration. Lace, ruffles, flowers, polka-dots, drips, and lots of sparkle greeted me. I opted to go simple—light pink frosting, gold drip, pink macarons, and flowers. Next, I found a few bakeries in my area that I thought could make my dream cake a reality.
I looked for bakers who were close to the party venue (my parent’s house) whose websites had pricing information and photos of their prior cakes and positive customer reviews. I emailed my first choice of bakery per their instructions, but didn’t hear anything back for days. I tried not to panic. I thought, I emailed them early on a business day, followed by a weekend, and then there were a couple days where they had posted closed hours. But who doesn’t check their business email at least once a day? I was debating if I’d have to reach out to another bakery since my time was quickly running out. However, after days of stalking my email, I finally got a message back saying they could make my cake. They gave me a rough estimate, including a smash cake, and answered a few other questions I had. A few emails, and a few days of me impatiently waiting later, my cake was ordered and paid for. Done. Two things checked off!
Make a List (or 2, or 3...)
While I was living through the stress of the birthday cake, I realized I was stuck on where to go from there. I decided I needed to make a list. Possibly many lists. Normally not someone to write down my to-do’s, I knew this was my best way forward. What did I need next? Food. Desserts. Entertainment. Decorations. Goodie bags. This at least gave me tangible goals to strive for.
Cook Up a Tasty Menu
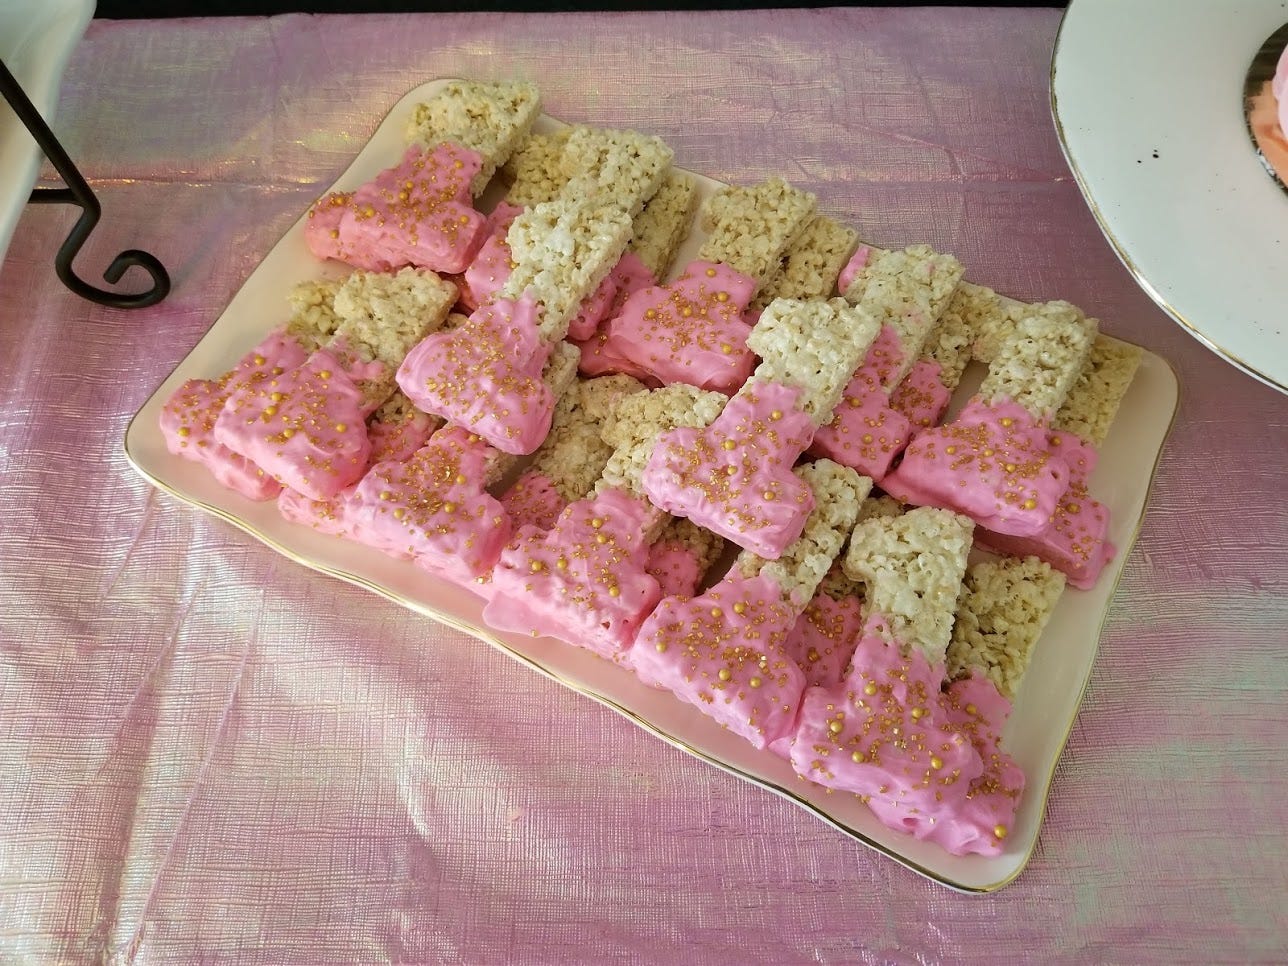
Since we decided to have the birthday party in the afternoon, it was too late for lunch and too early for dinner. Small finger foods and things that are easy to munch were the way to go. To keep things easy, I went for bulk items that didn’t need more work than being picked up or maybe thrown in a slow cooker. A meat and cheese tray with rolls for sandwiches, frozen meatballs for the crock pot, a cheesy bean dip with chips, and some fruits and veggies: basic party fare that kids and adults would enjoy. For dessert, we already had the cake, and I decided to add pink chocolate dipped “1” Rice Krispie treats (thanks again, Pinterest).
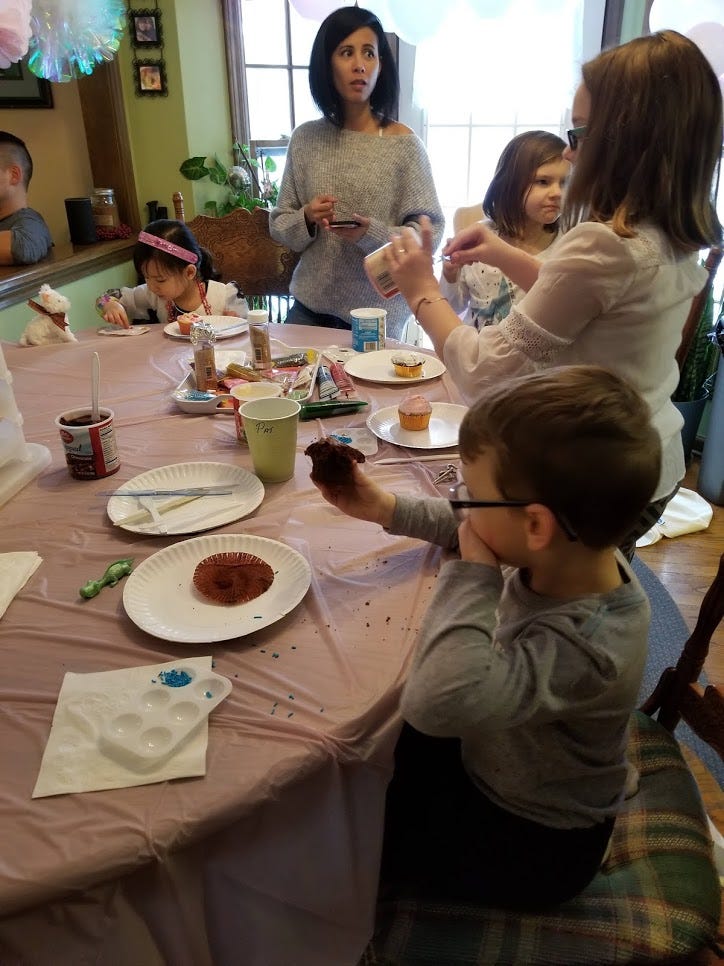
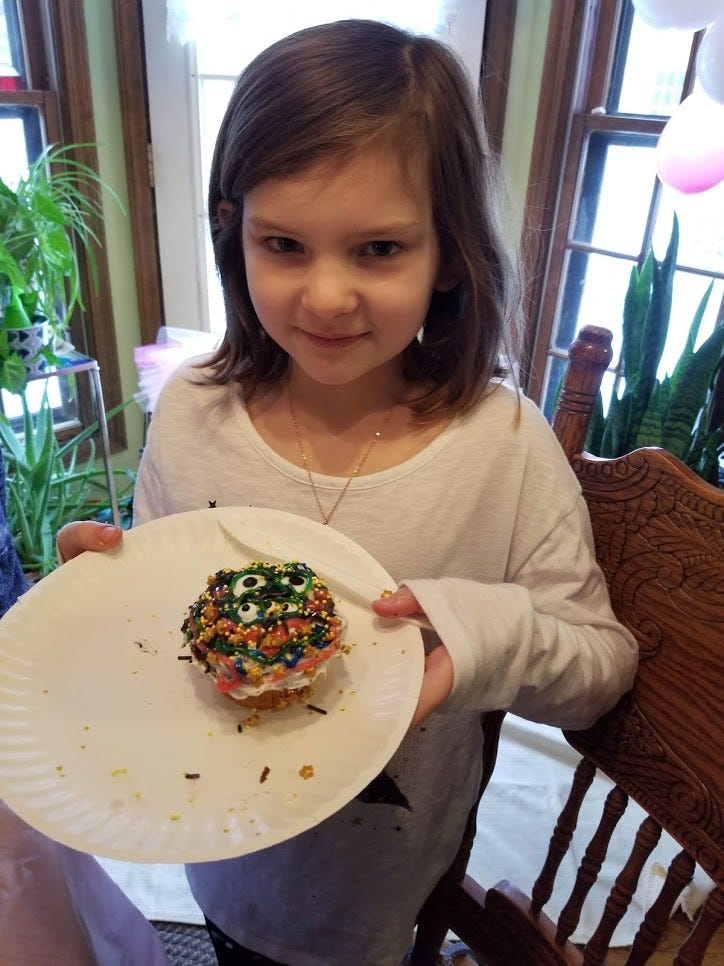
For one last dessert, I figured we could make it interactive—what would boys and girls of all ages enjoy? Decorating cupcakes! Given that kids aren’t flavor connoisseurs, and that I was trying to keep this activity budget-friendly, I used boxed cake mixes: funfetti and chocolate, with four frosting choices. I got individual color packets of sprinkles, a fancy box of decorations that includes eyes, lips, and mustaches, and some tubed colored gel icing. To keep the mess down, we’d have the kid’s decorate their cupcakes on paper plates. This was both fun and delicious!
Plan Fun Activities for the Kids
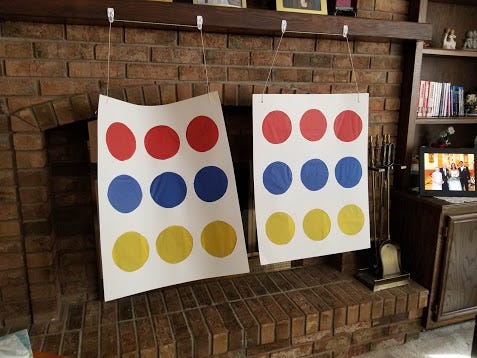
With the cupcake plan down, my next biggest struggle was figuring out another activity to entertain the kids. I hit a few bumps in the road immediately. First, there was a large age gap to contend with. Would a fun activity for the 2-year-olds really be fun for the 11-year-old? Second, with it being winter in the Midwest, outdoor games weren’t an option. I needed something affordable that wasn’t too messy, could take place inside, and involve all the kids, (and hopefully expend some of their energy). After looking into a bunch of different options, I decided to make a Rainbow Punch Board with prizes. All I needed for this was two pieces of poster board, colorful tissue paper, paper bags, scissors, tape, and prizes. After everything was purchased, the whole thing cost maybe $30, and that includes 18 prizes. This was going to be a hit (literally)!
Learn how to make your own Rainbow Punch Board here!
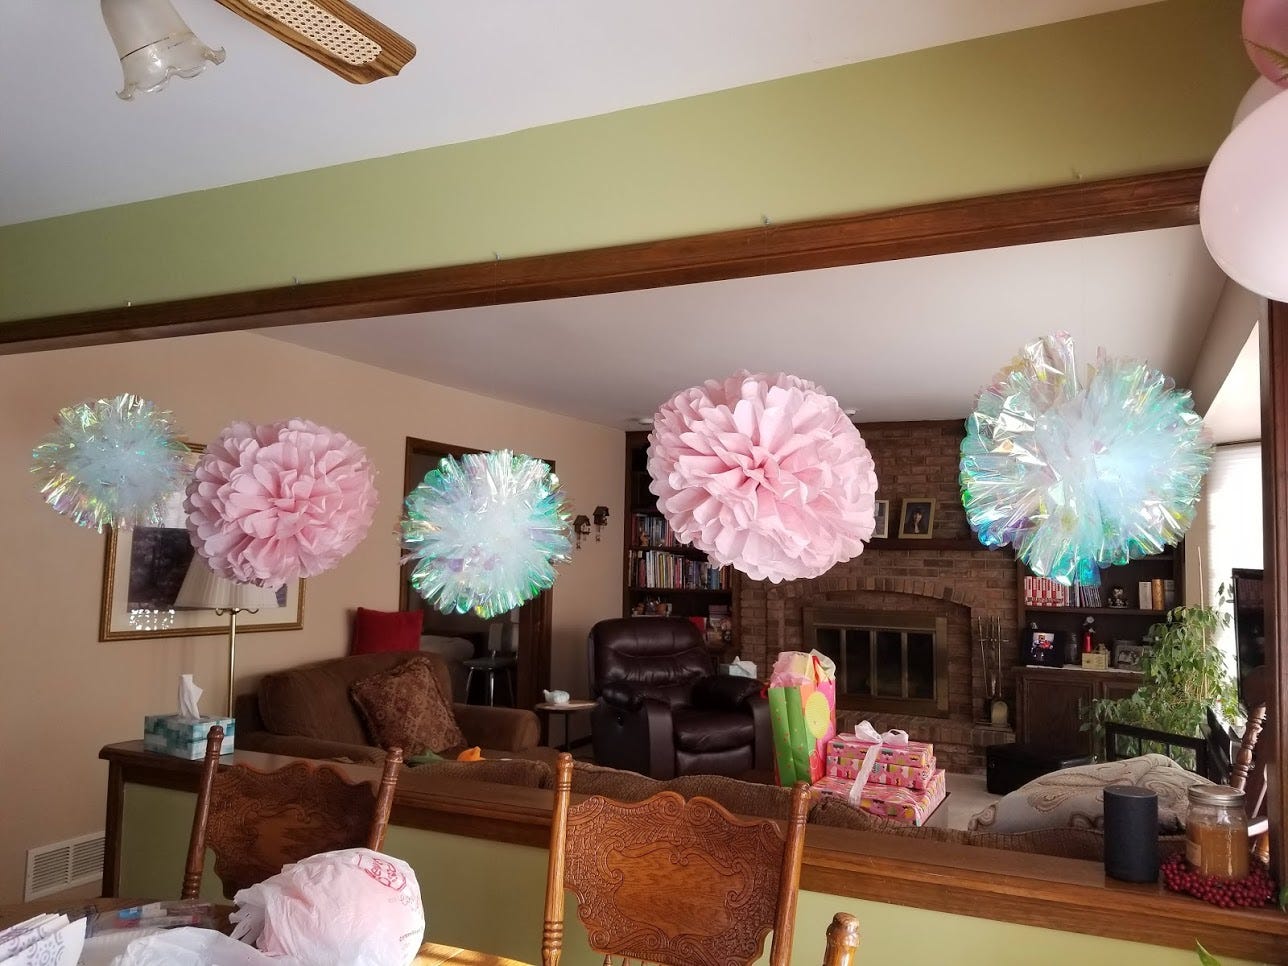
Assemble the Decorations
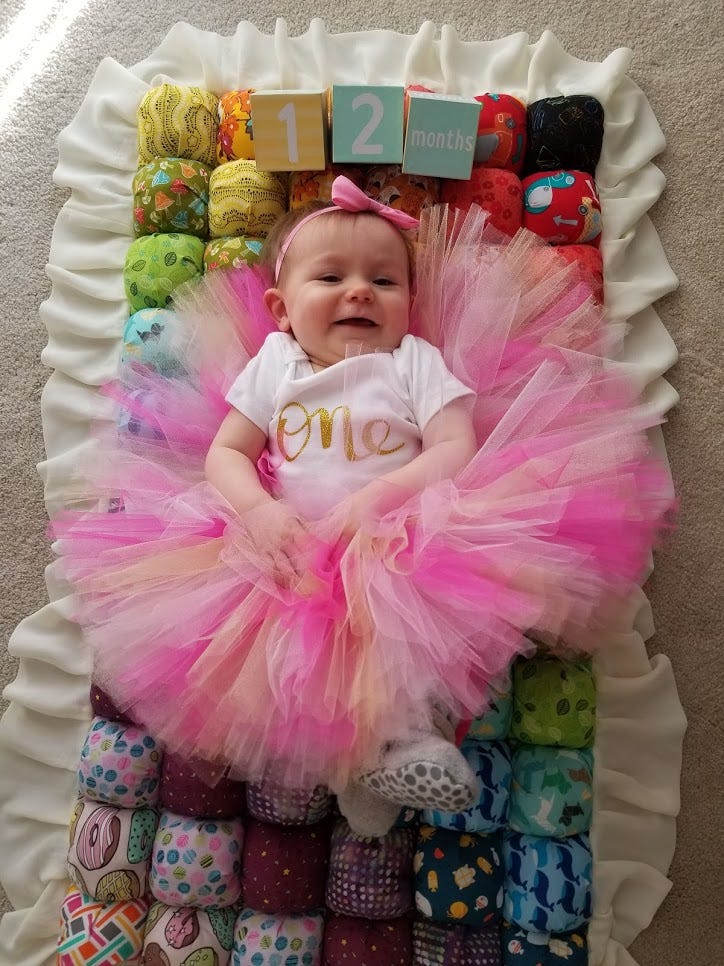
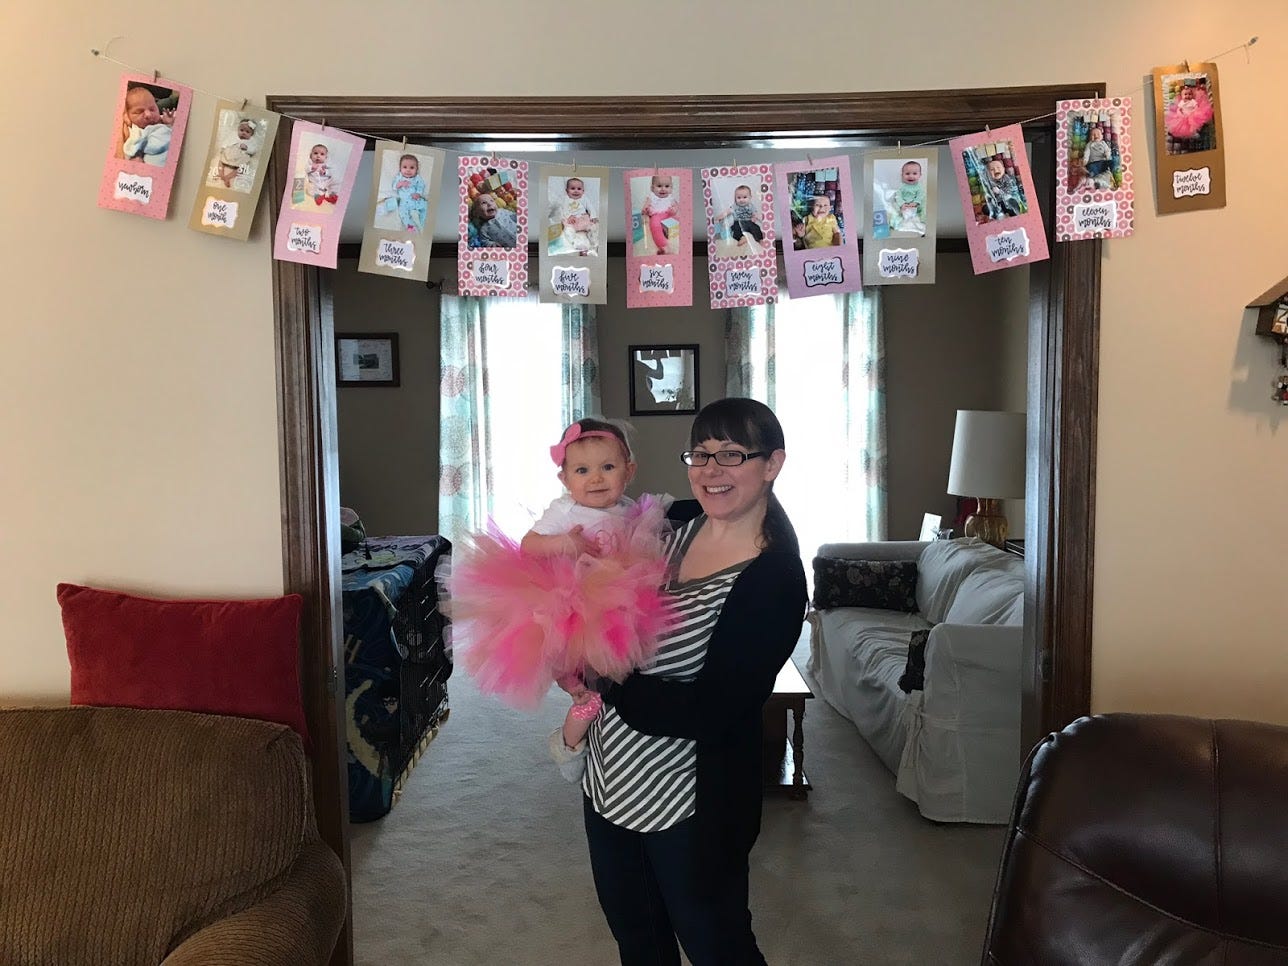
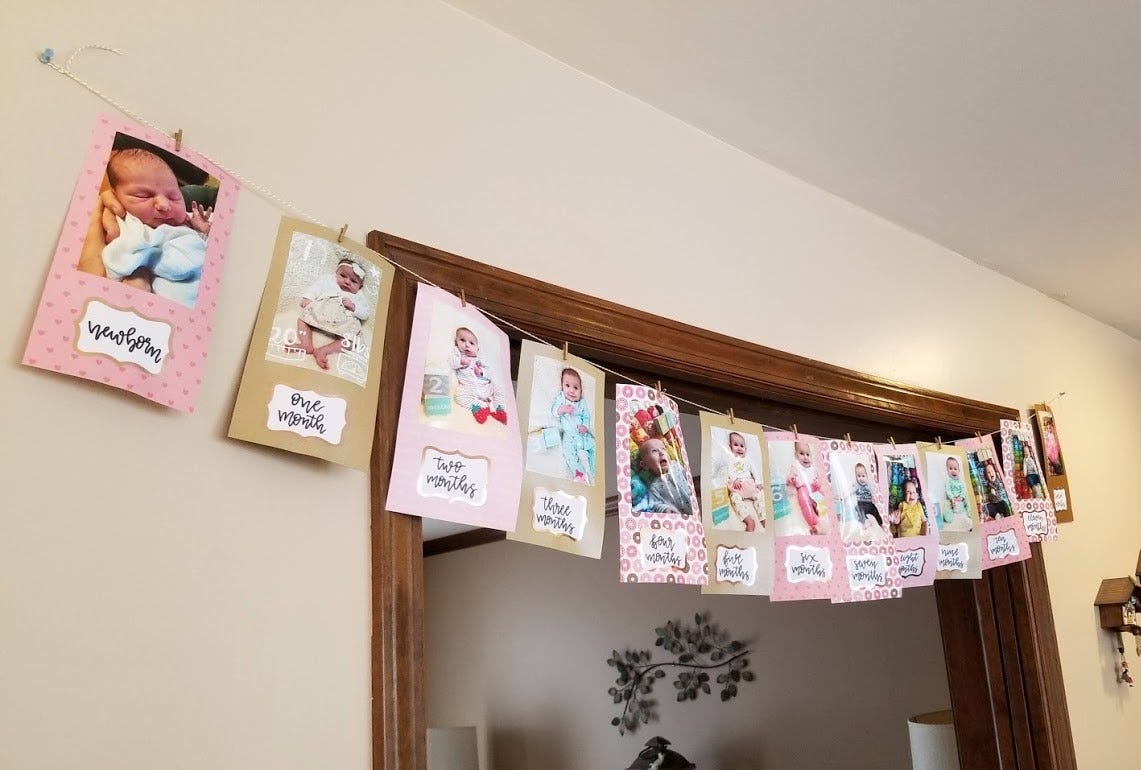
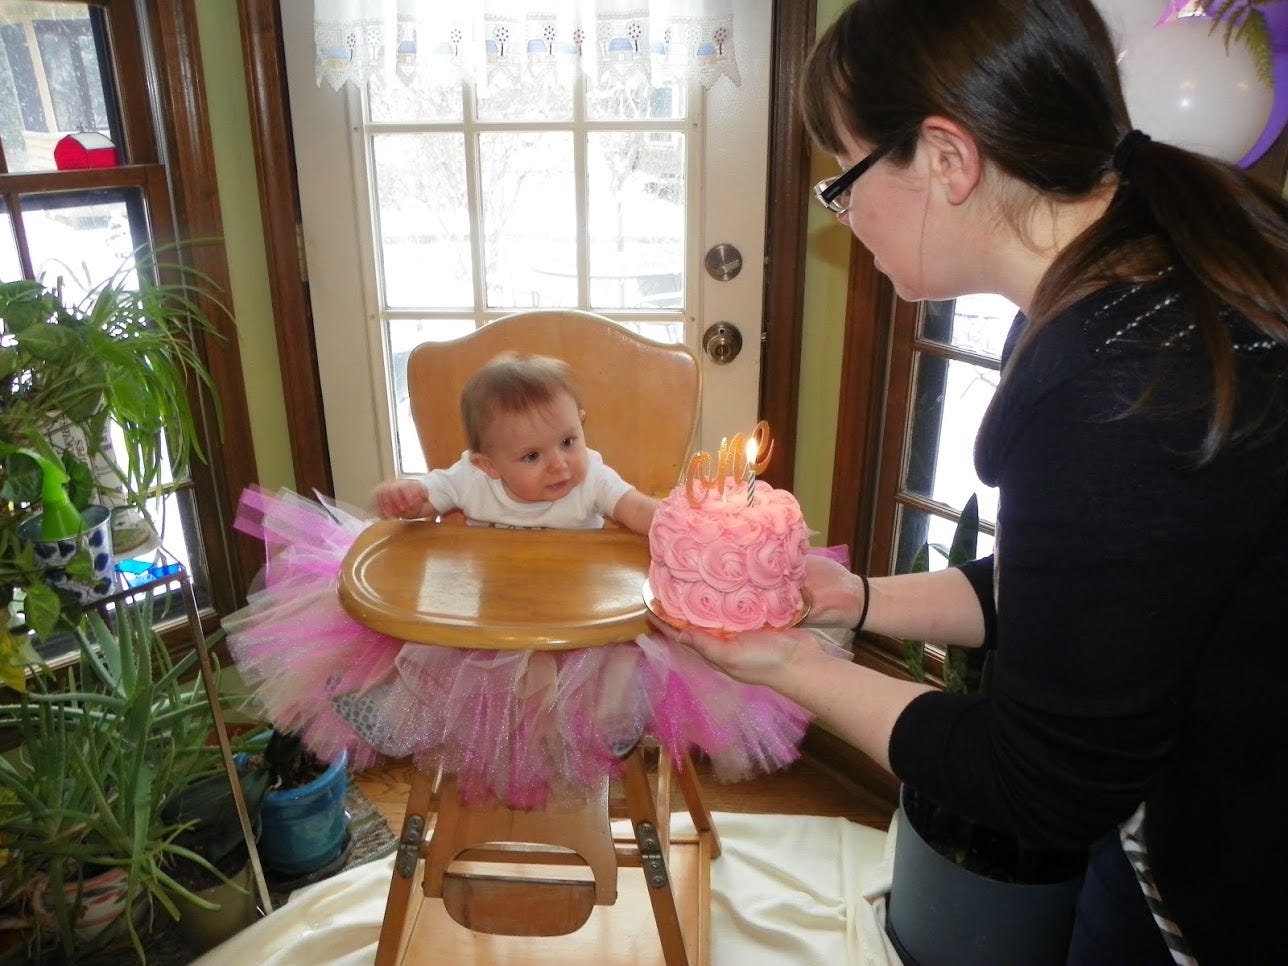
With food, dessert, and entertainment checked off my list, I was on to the decorations. What were the things that every Instagram-ready first birthday party needed? A banner for each month of her first year (I didn’t take those monthly photos for nothing!), a tutu skirt for the highchair, cake toppers, and a balloon garland.
I looked on Etsy for a couple of these items, but balked at the $60 price tags. Most of these decorations would be easy enough to make, especially with some help from my crafty sister Natalie.
Birthday Banner
As Natalie is practiced in calligraphy, she tackled the monthly banner. Using some cute pink and gold scrap booking paper, blank name cards, twine, and decorative paper clips, we were able to make this project ourselves.

Tutu Highchair Skirt
I made this in two nights with a few rolls of tulle from my local craft store and twine.
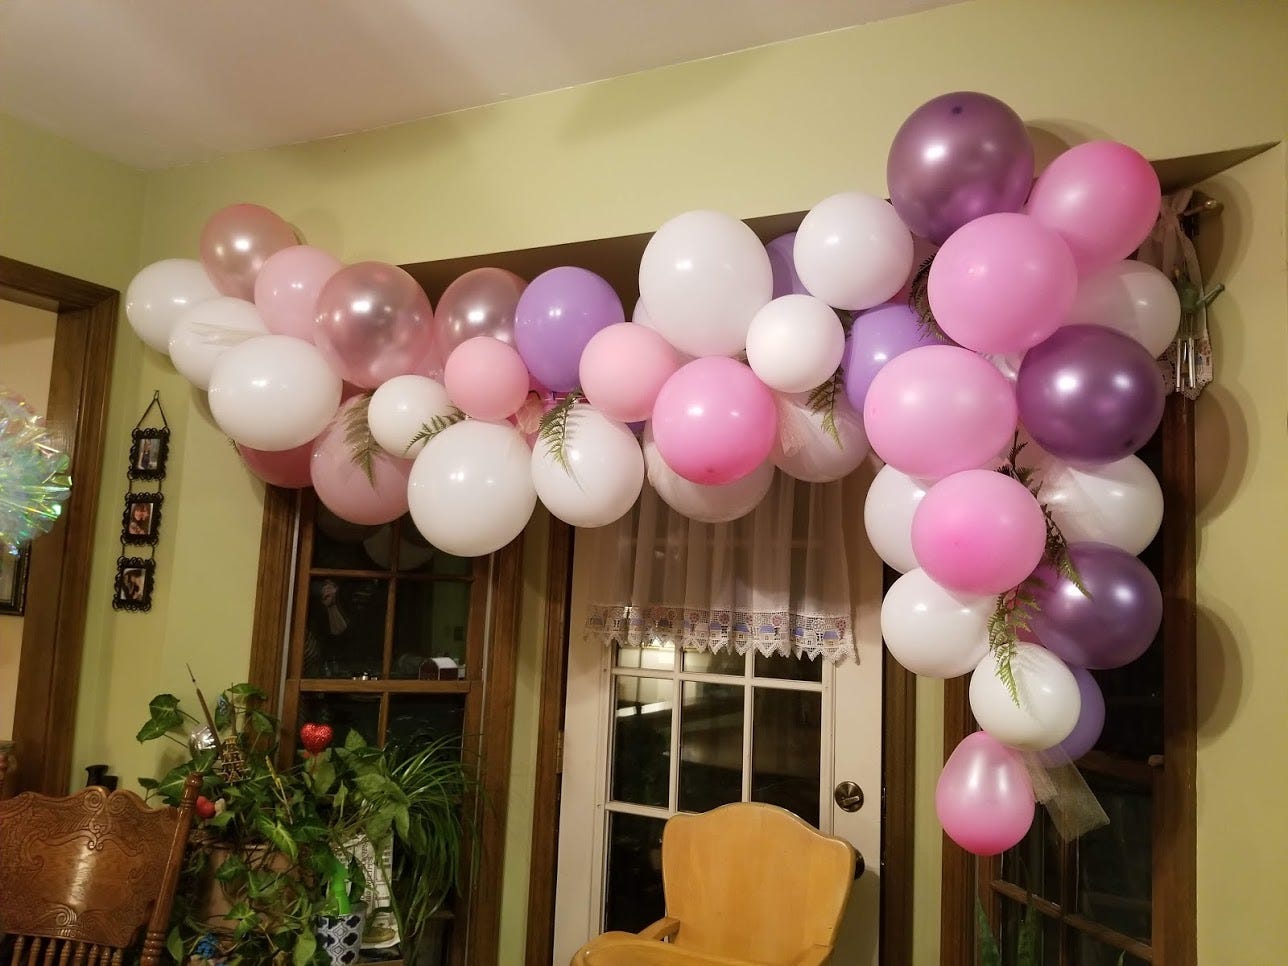
Balloon Garland
The balloon garland was easier than I expected. All I needed was balloons, twine, and a sewing needle. My mother helped put the garland together the day before the party.
Cake Toppers
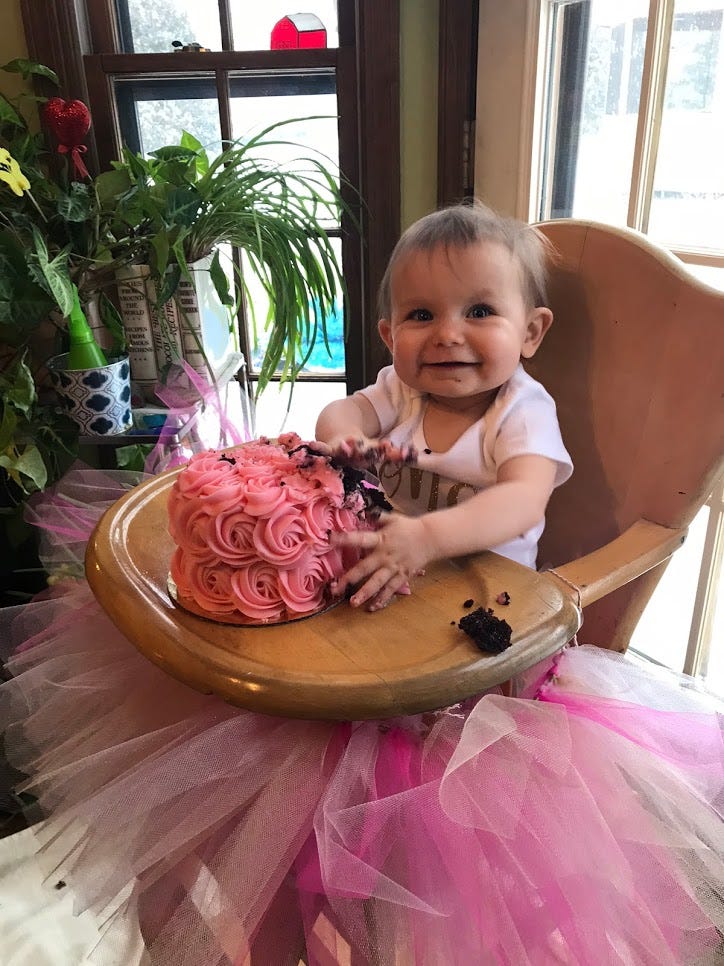
I did rely on Etsy for the cake toppers. I ordered a one-time use sparkly gold topper for the smash cake. For the main cake, I spent a little extra for a wooden, laser-cut piece. I figured we could use it every year on Lucy’s birthday cakes, and hopefully it would become a happy tradition for her. It was well worth the cost for that!


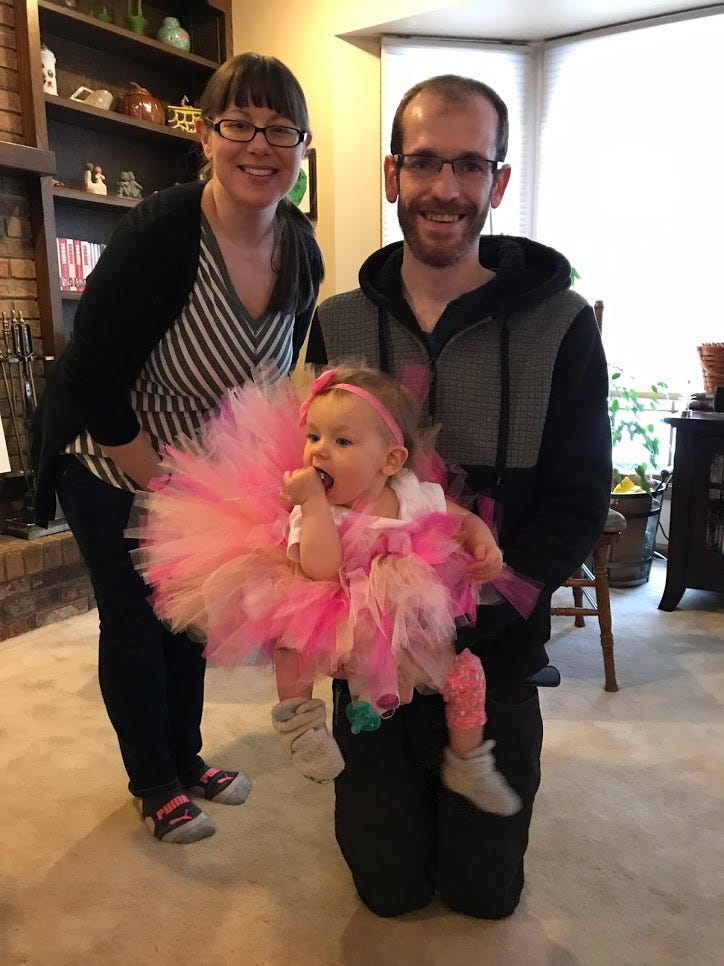
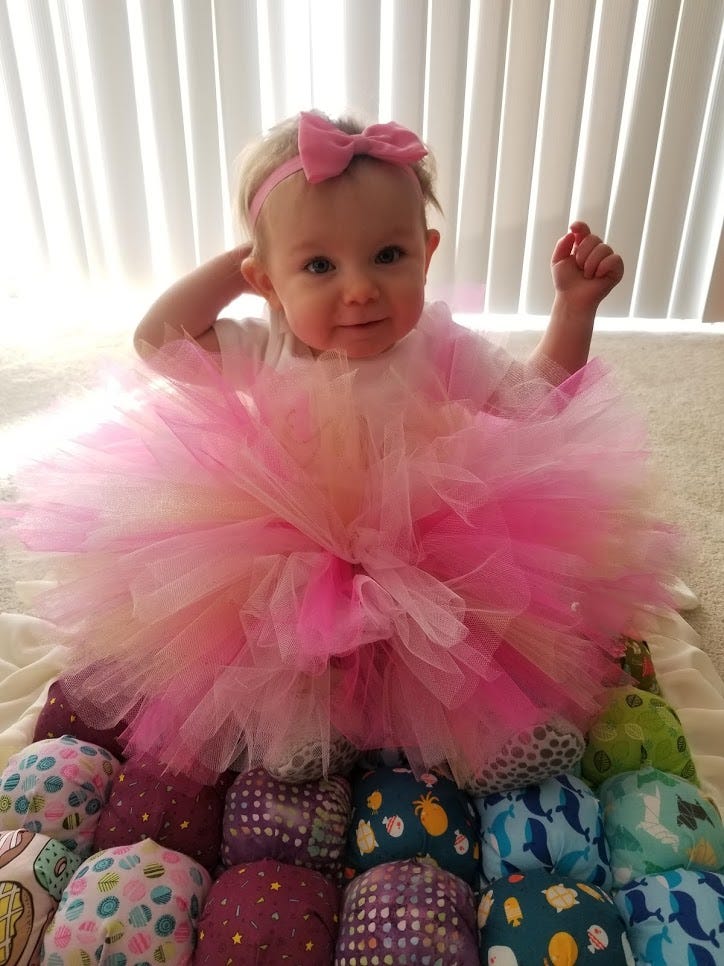
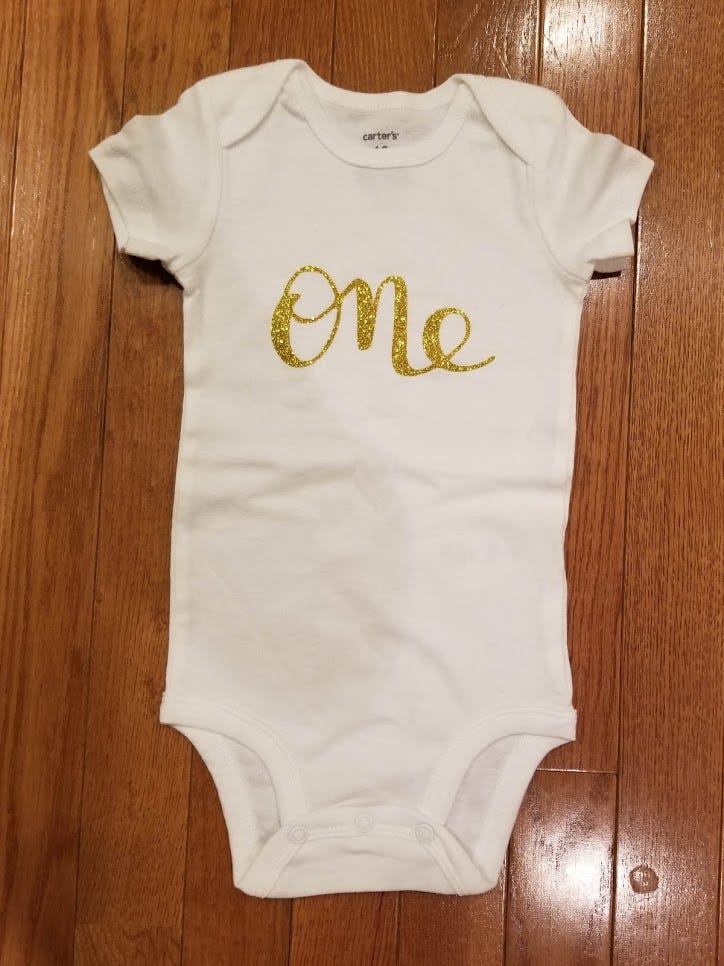
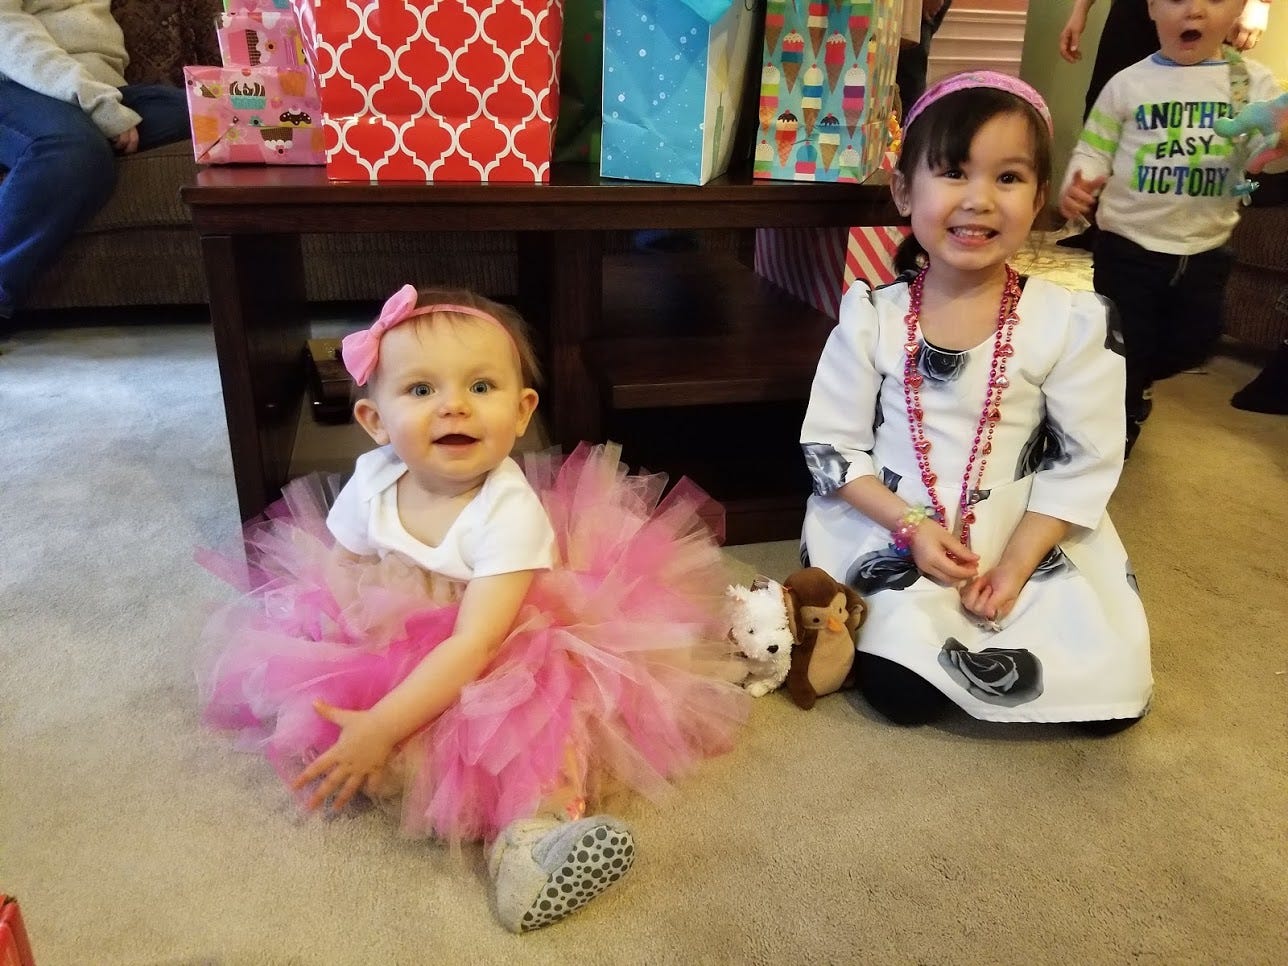
Choose the Birthday Girl's Outfit
The last thing I needed was an outfit for Lucy. Keeping with fulfilling my Instagram/Pinterest dreams, this had to be a big tulle tutu skirt and a “one” onesie. I watched a few tutorials on how to make the skirt and headed off to the craft store. A cut of a thick elastic band, three shades of pink, and one gold spool of tulle later, I went home and got to cutting. The skirt only took a few nights to complete and it ended up being better than I imagined! Not only was it adorable, Lucy didn’t complain while wearing it, and now it’s something she can play dress-up in for years to come.
Learn how to make your own fluffy tulle tutu skirt here!
Final Preparations: The Day Before the Party
The day before the event, I went on a huge shopping trip. I got the food, cupcake decorating supplies, table cloths, and treats for goodie bags. At my parents’ house, my mom whipped up the Rice Krispie treats and got to dipping while I tackled the cupcakes. Together we got the house decorated. I finally felt like I was going to be able to have a successful party.


PARTY TIME!
And now, for the main event! My husband, Lucy, and I arrived early to finish any last-minute decorating and food prep. Lucy got a good nap in, and guests started arriving right on time.
I was still pretty nervous that I didn’t have enough to fill up two hours of time, but things ended up flowing naturally. As we waited for everyone to arrive, the adults got plates of food and chatted while the kids entertained themselves. Our last arrival was at 2:30, and with all the kids present, it was time for the Rainbow Punch Board. This went over so much better than I imagined! I had the kids line up and explained the (very simple) rules: Punch into a circle and get a prize. That’s it!
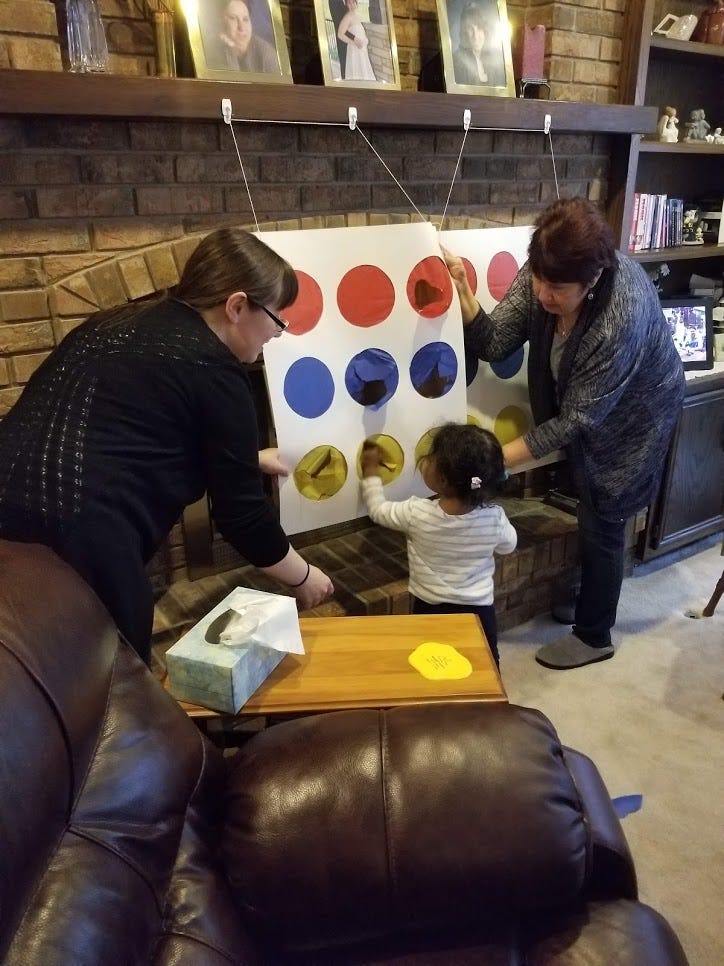
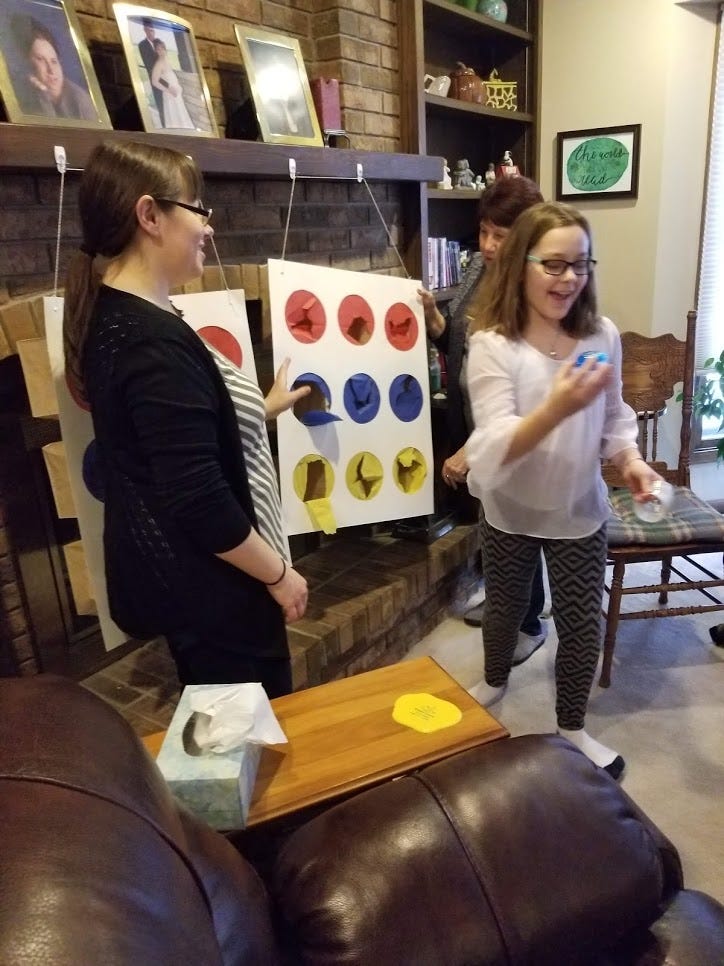
I was amazed at how much they liked this game and the prizes—a small puzzle, a slingshot lizard, Play-Doh, erasers, and other small treats. They exclaimed, “Yes!” “Look at this!” and “I’m keeping this!” as they pulled out their prizes. Each kid got to go through the line two or three times.
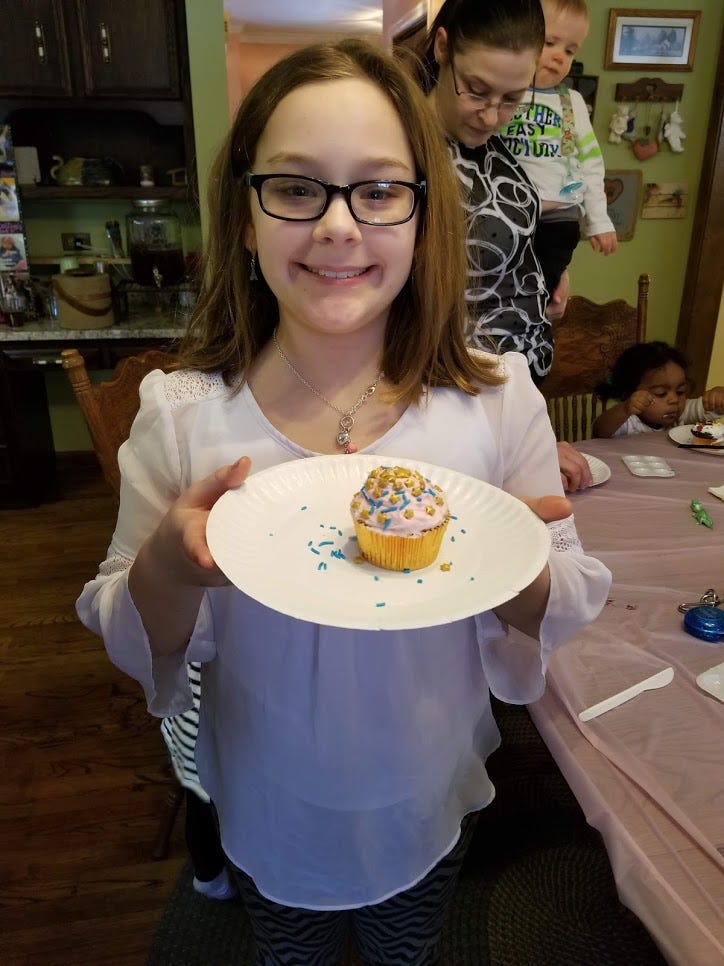
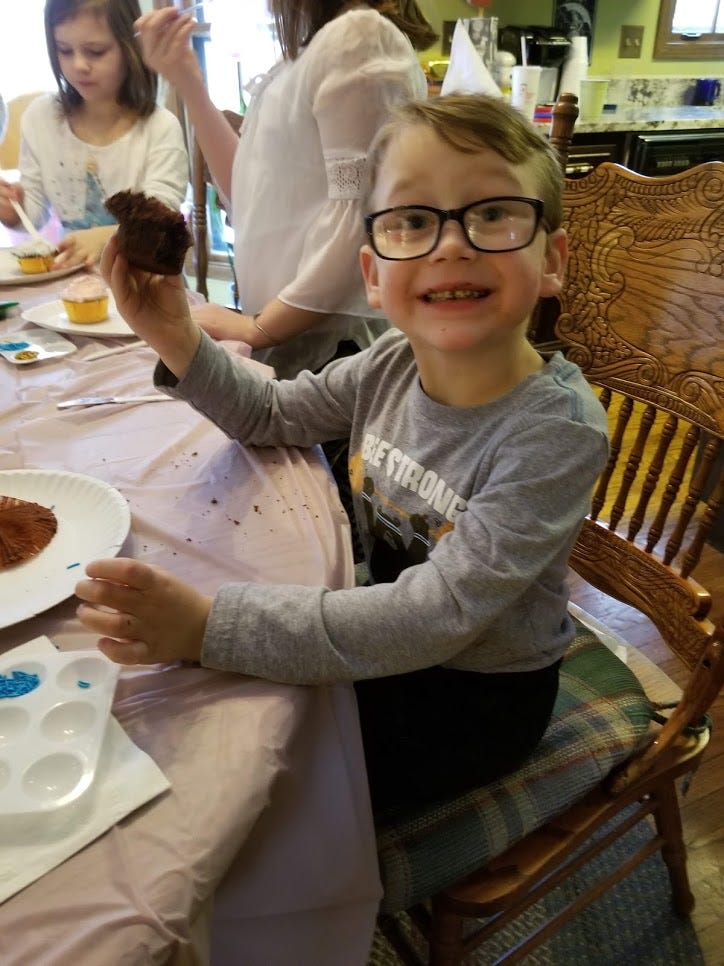
We moved right on to the cupcake decorating from there. This was a lot of fun for the kids, and it was pretty neat to see their personalities come out. Some took their time, slowly and perfectly placing sprinkles and eyes, squeezing jelly icing to make hair, and asking to make more than one. But then we also had kids who slapped on a glob of frosting, tossed some sprinkles at it, and asked if they could dig in.

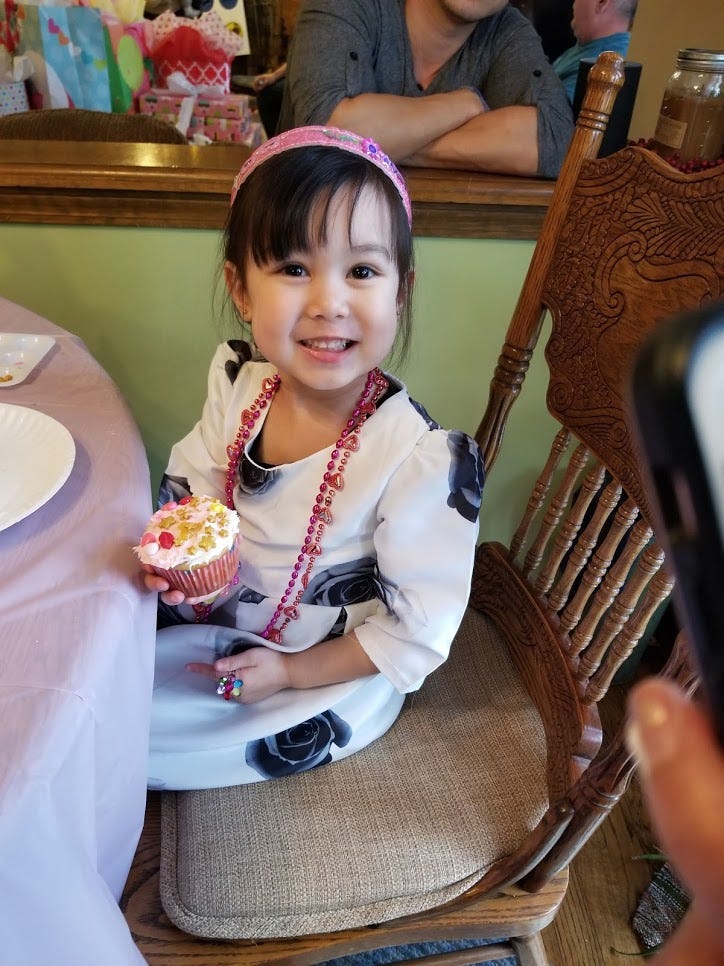
Next was time for Lucy to dig into her smash cake! While she didn't get as messy as I was hoping, she did have a good time!
Now sufficiently sugar-fueled, the kids ran off to play with their Rainbow Punch Board prizes and the adults cut into the lemon and raspberry-filled cake. As beautiful as it was, I didn’t pay that amount of money for it not to get eaten—and it was delicious! It was well worth the stress I experienced while trying to get it ordered.
Last thing on the to-do list was to open gifts. We made quick work of it as all the kids wanted to help Lucy unwrap. Lucy had fun playing with some new clothes while we were excited by the packs of diapers (won’t be able to get away with those as gifts for long!).

After everything was said and done, we basked in the afterglow of a party well-planned and Lucy well-celebrated. It was a fun experience, and I’m more confident in my party-planning abilities. I came out the other side of this event with a few important lessons anyone can learn from.
7 Party-Planning Takeaways from Someone Who's Been There
1. Remember: you don’t have to tackle this alone. You’re not the only one who has had seemingly-silly questions about a kid’s birthday party. It’s OK to ask friends and family about their experiences, and if all else fails, turn to the internet. Someone out there will give you better understanding or insight.
2. Organization is key. Make lists! Guest lists, to-do lists, shopping lists, lists of lists. While I knew the first couple steps I needed to take to get this party started, I was lost after that. I wouldn’t have been able to move forward with much confidence if I didn’t write out my next steps.
3. Go with the flow. I had to give up the party theme I had been dreaming about for months, but quickly got on board with a new one. I think it turned out better that what I was originally planning!
4. With a little creativity, it’s easy to be budget-friendly and still have great food and decorations.
5. Live a little. While keeping the event affordable is always great, splurging on one or two items is fine! I was thrilled with the expensive birthday cake and topper I got, and wouldn’t have it any other way.
6. Rely on the help of others when you can. My sister and mom were instrumental in helping me pull this off. I could not have done it by myself.
7. Less is more. I was worried I wouldn’t have enough to fill the time and that kids and parents would be bored. Things ended up flowing pretty naturally though, and when we weren’t doing a group activity, the kids were able to entertain themselves. It ended up being the perfect amount activities to fill the time.
With everything I learned, come next year, I’ll be ready to tackle Lucy’s 2nd birthday party with confidence. (Though I’m not ready for my little girl to grow up that fast!)